


A record 55,231 fans across three days set the stage for one of the most dramatic editions of the Bathurst 12 Hour in recent memory, as the field rolled to the line under lights at Mount Panorama Circuit for 12 punishing hours around the Mountain.
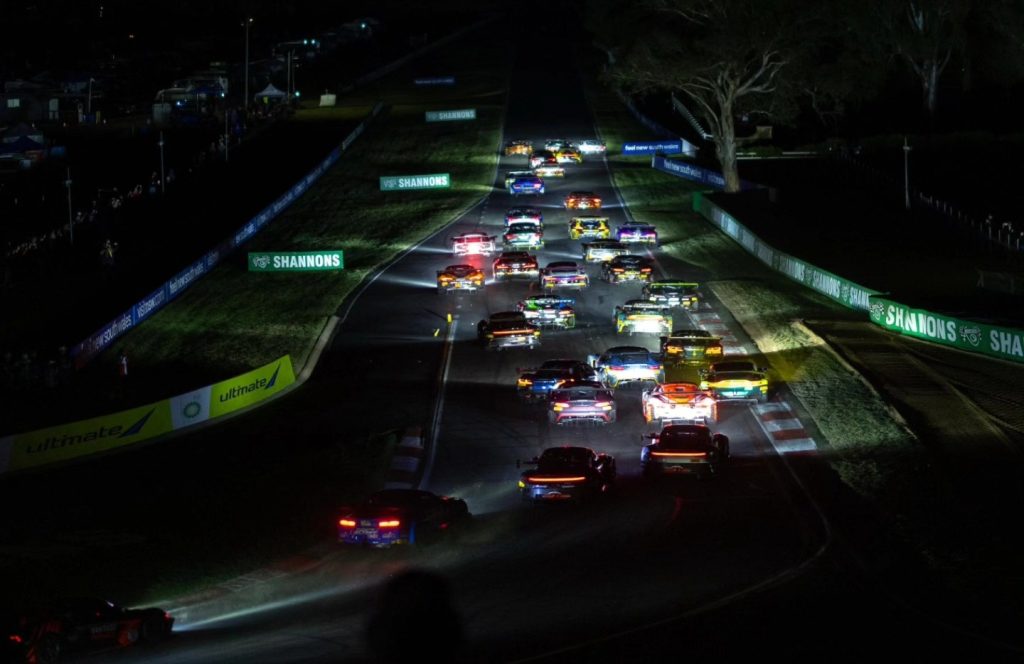
From the moment the race began, it was clear this would be no ordinary endurance contest. The front row launched cleanly, but by the time the field funnelled toward Quarry Bend, they were three-wide.
Maximilian Götz seized the initiative in the #77 Mercedes-AMG Team Craft-Bamboo Racing entry, muscling ahead of pole-sitter Thomas Randle in the #222 Scott Taylor Motorsport Mercedes.
Alessio Picariello immediately put the #911 Porsche into podium contention, while Augusto Farfus surged from seventh to fourth in the #46 BMW. The tone was set: aggression, urgency, and no patience despite 12 hours on the clock.
For the Kiwi drivers, the opening stint was a study in contrasts. Jaxon Evans wasted no time turning heads, hauling the #26 Arise Racing Ferrari from 18th on the grid into the top 10 in a blistering opening charge.
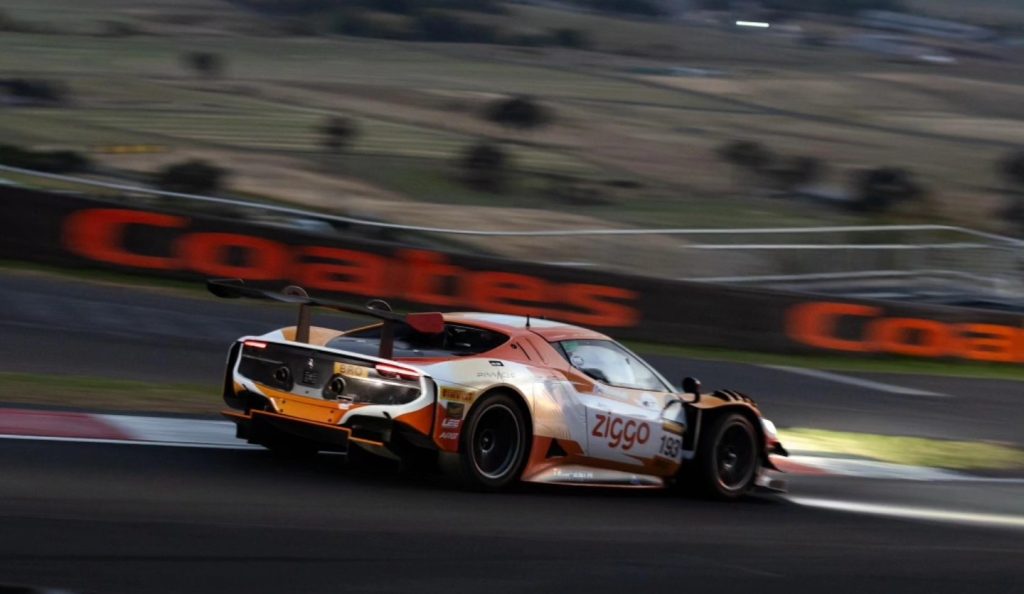
His pace through traffic was clinical, positioning the Ferrari as an early threat. Ryan Wood’s #193 Ferrari also moved forward from 16th, climbing into the mid-teens and quickly establishing itself as a contender in the Bronze class.
Earl Bamber’s #2 Johor Motorsports Corvette began methodically advancing as strategy played out. Meanwhile, Brendon Leitch endured a nightmare start, the #44 Mercedes slipping from eighth to 22nd as the field concertinaed in the opening laps.
Just 18 minutes into the race came the first major shock. The #64 HRT Ford Mustang struck a kangaroo at over 250km/h on Conrod Straight in a sickening impact that obliterated the front of the car and left Christopher Mies bloodied but able to climb out.
The safety car was immediately deployed. Mies later described losing visibility entirely as the windscreen shattered and debris filled the cockpit. The wildlife strike not only eliminated a contender but triggered the first major strategic divergence, with several teams diving into pit lane to attempt an early undercut.

That decision dramatically reshaped the running order. When racing resumed with more than 11 hours remaining, Bamber and co-driver Alexander Sims were among those who had gained track position through the shuffle.
Evans also capitalised, climbing back toward the top 15 before pushing into the top 10 once pit cycles stabilised. Wood continued to hover around the fringe of the overall top 10 while maintaining a firm grip on the Bronze class battle.

The race settled briefly into a rhythm before Mount Panorama struck again. Just under 10 and a half hours to go, the #268 Team BRM Audi featuring Kiwi Steve Brooks dropped its right rear into the grass at Brock’s Skyline and snapped violently into the barriers.
The heavy damage brought out another safety car. Compounding Kiwi frustrations, Leitch’s #44 Mercedes had been circulating with hazard lights flashing before retreating to the garage with a suspected mechanical issue. The Tigani Motorsport crew worked feverishly to diagnose and repair the problem, eventually sending the car back out — but already multiple laps down.
At the front, the complexion of the race was shifting. After another sequence of pit stops, Valentino Rossi briefly led in the #46 BMW, with Charles Weerts in the sister #32 BMW also prominent.
Yet the story building momentum was the #2 Corvette. Approaching the three-hour mark, Sims made a decisive move to take the outright race lead, placing Bamber’s crew at the head of the Pro class and the race.
Evans’ Ferrari climbed as high as fourth during this phase, while Wood’s #193 Ferrari was leading the Bronze class and running just outside the overall top five. Three hours in, Kiwi drivers were leading Pro and Bronze, and multiple cars were entrenched inside the top 10.
The race’s volatility intensified as light rain began to spit at the top of the Mountain around the halfway mark. Officials declared the circuit wet, opening the door for tyre strategy gambles.
As teams weighed their options, drama struck the pole-sitting #222 Mercedes. Thomas Randle lost the car coming down The Dipper, damaging the front splitter and right-rear.
Despite emergency repairs and a driver change to Chaz Mostert, smoke soon appeared from the wounded machine. After being one of the dominant forces in the opening half, the pole-sitter was ultimately retired.
Safety cars continued to punctuate the race, including one triggered by debris after the #46 BMW clipped pit exit markers. Each neutralisation reshuffled the order and erased margins painstakingly built over long green-flag runs.
With under five hours remaining, Bamber’s #2 Corvette was dealt a heavy blow — a drive-through penalty for a safety car restart infringement. Catsburg served the penalty, dropping from podium contention to eighth and 32 seconds off the lead. Yet the Corvette refused to fade, clawing back into the fight through pace and strategy.
Then came another devastating chapter for the Kiwi field. With 4 hours and 18 minutes remaining, the #268 Audi suffered a second massive crash, this time at Sulman Park.
James Golding dropped a wheel onto the grass at over 200km/h, the car spearing into the concrete barrier and bursting into flames before coming to rest on the opposite side of the circuit. Golding climbed out unaided, but the Audi was destroyed, ending the team’s campaign in dramatic fashion.
Moments later, a multi-car accident at Forrest’s Elbow forced a red flag. The #79 Porsche, featuring Kiwi Daniel Gaunt, had earlier brushed the wall and was circulating slowly when contact from behind sent it sideways across the circuit.
A chain reaction unfolded in the blind section, with heavy impacts for several cars. Ralf Aron’s #77 Mercedes arrived with little time to react, smashing into the stranded Porsche. Both drivers emerged under their own steam, but the race was over for the #79 TSUNAMI RT and #77 Team Craft-Bamboo Racing team.
Despite the attrition, the #2 Corvette remained in contention entering the final two hours. Catsburg executed bold overtakes to regain track position, at one point battling Augusto Farfus and moving into third. Evans’ Ferrari hovered around the top 10, within striking distance of a top-five finish. Wood’s #193 Ferrari led the Bronze class deep into the race before a late pit cycle shuffled it back into a tight battle with the #21 Porsche.
With just 1 hour and 37 minutes remaining, heartbreak struck Kiwi fans. Bamber, back behind the wheel and pushing hard, reported a sudden rear snap approaching Skyline. A suspected toe-link failure left him with no rear steering control.
He took the escape road before spinning into the tyre barriers at The Dipper. The damage was terminal. After leading laps and surviving penalties, fuel scares and safety cars, the #2 Corvette’s race was over in cruel fashion.
The final hour was frantic. A restart with 39 minutes remaining erupted into contact at Turn 1 as Jules Gounon attempted to force his way past Kevin van der Linde. The bumping shuffled both cars backward and handed the lead to the #888 Mercedes-AMG Team GMR entry of Maro Engel, Maxime Martin and Mikael Grenier. From 29th on the grid, they had quietly climbed through the chaos and now controlled the race’s closing stages.
Behind them, the #86 High Class Racing Porsche secured second overall and the Bronze class victory, while the #46 BMW of Farfus, Rossi and Marciello completed the podium. The #55 Audi and #89 BMW rounded out the top five.
For the Kiwis, resilience defined the final results. Ryan Wood and the #193 Ferrari secured third in the Bronze class and finished 13th overall after leading their category earlier in the race.
Jaxon Evans delivered one of the most composed drives of the event, climbing from 18th to finish ninth overall in the #26 Ferrari — a significant result in a race where simply surviving was an achievement. Brendon Leitch guided the repaired #44 Mercedes to 20th overall and fourth in class, salvaging pride after early disaster.
Earl Bamber, Daniel Gaunt and Steve Brooks were all classified as DNFs after high-speed incidents in one of the most punishing editions of the Bathurst 12 Hour in recent memory.
Seven safety cars. One red flag. A wildlife strike at 250km/h. Rain threats. Mechanical failures. Fires and steering failures at Skyline. The Mountain demanded everything.
For much of the day, Kiwi drivers were central to the fight at the front. They led, they charged, they contended. But as Bathurst so often proves, survival is the ultimate currency — and only a handful conquered the Mountain in 2026.
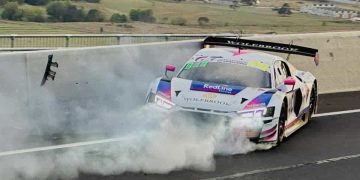
Header Image: Stefanie Imbruglia